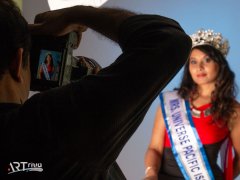
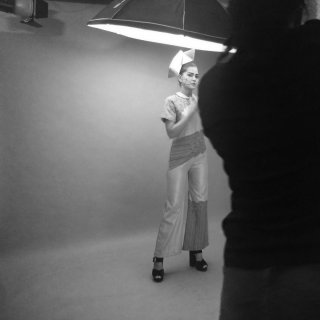
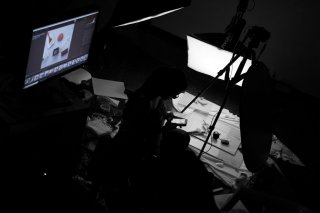
Organising and executing your own studio session is affordable !!
It is one of the best ways to take your photographic skills to the next level.
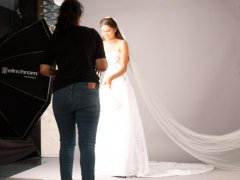
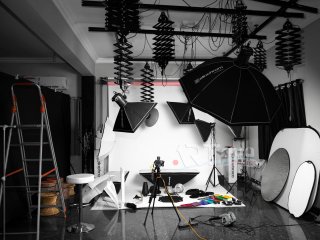
The primary advantage of shooting in a studio is the ability to control and shape the quality of light. Shooting under studio lighting also allows even low end / cropped sensor cameras to render sharp, well-detailed images. All of this control and quality means having access to a sufficiently large space and all the equipment that goes with it, usually a fairly hefty price to own & maintain. Thereby making renting a studio space is a great way to gain experience without the financial pain of buying your own equipment.
Tips for Renting a Studio Space
While finding a studio is relatively easy, there are a few things to be aware of before making a booking:
- Rates: Rates can vary greatly from studio to studio however so can the method of calculating time & included usage times, so it’s worth double-checking especially when charges are listed by fractions of a day & what equipment is included in their plans
- Size: Studios come in a range of sizes, available equipment, location etc, & this has a direct correlation on charges. Note, bigger spaces are always better as they offer a greater array of creative options & allows for easy preparation.
- Hidden Charges: Beware of hidden charges/taxes, for examples include the use/damage of consumables such as backdrop paper which can make a big difference in terms of the total rental costs.
- Overtime: Most studios will charge a premium for overtime and its important to be aware of these before booking. Plan your shoot carefully to avoid any overruns and nasty surprises. Do look out for studios which offer lowe pricing for extended hours.
- Equipment Hire – Whilst most studios include standard equipment in their charges, many charge extra for each piece of additional equipment. Also do not expect studios to have every piece of equipment you need, you will still be expected to bring your own camera & cording media. They will be able to source additional equipment at better prices from equipment vendors.
- Assistant/Tutoring: Some studios offer the use of an assistant, to help you set up in the studio space, this can be a great way to learn how to use available equipment and make the most of the session time. Also if you are a beginner do look for studio spaces run by photographers who also teach photography.
Blog Studio
raksha_working.jpg
https://artriva.com/images/portfolio/raksha-rajkumar/working/raksha_working.jpg
plain_learning.jpg
https://artriva.com/images/portfolio/raksha-rajkumar/wks/plain_learning.jpg
bio_a.jpg
artriva_studio_equipment_1.jpg
https://artriva.com/images/portfolio/our-studio/artriva_studio_equipment_1.jpg
mrs_india_2018.jpg
https://artriva.com/images/portfolio/our-studio/mrs_india_2018.jpg
chrystlin_raksha.jpg
https://artriva.com/images/portfolio/our-studio/chrystlin_raksha.jpg
t_shoot.jpg
Setting Up the Shoot
So let us assume you have found a studio, the rate looks good and it’s free at a convenient time. What’s stopping you from making the booking and going ahead with your shoot?
Probably that healthy fear of failure!! but with preparation and planning, there is absolutely no reason to delay your shoot any longer.
Here are a few tips to help you execute your first studio session with ease:
Talent: Probably the one thing on top of your to-do list is having someone to be your model in the studio. While having a professional model makes a difference in terms of contributing to your shoot, it isn’t essential to have one. More importantly, try to have someone interesting to photograph, who can be a friend, an upcoming artist or another photographer. Starting off with someone whom you feel comfortable with will help you build confidence as well as your skills. (PS: it's probably best to save booking a model for your second session by which you would have got a basic hand of things)
Working with the model – It is easy to forget that your model is a real person, taking the time to get to know them before the shoot day will make a huge difference. Try and involve them in the planning of your shoot, including any ideas or requests they have will help make them feel part of the session and improve the overall experience for everyone. Remember to keep talking to them and whatever you do avoid hiding away behind the camera.
Lighting – The most time-consuming part of any shoot is the lighting setup and therefore it's essential to make sure you have a plan of action before going into the session. Ideally, plan two to three lighting setups (depending on how much time you have booked), the internet can be a great source of ideas and tutorials. Its best to pick something simple as not only will this be easier to do on the day it will also mean you have more time to work with your subject. Good suggestions include single light setups, headshots and plain backdrop shots.
Make it a team event – If possible try and find a fellow photographer (preferably a friend) to share the experience with you. Making this a group activity can help in a number of ways, aside from sharing the costs, having a number of people on hand can help with setting up the shoot, making lighting adjustments and entertaining the models in between different setups.
Latest from Sukla Chinnappa
- Capturing Kids Naturally: A Photographer’s Guide to Fun, Stress-Free Photoshoots for Ages 1–7
- Kantara: Chapter 1, Nature, Dharma, and the Forgotten Balance
- Understanding Pricing Photography Services
- Quick guide for getting noticed on Matrimonial Websites & Dating Apps
- Quality E-Commerce Photography at Affordable Prices


