



Behind the Craft (18)
How a photograph actually gets made — technique, gear, and the thinking behind the frame.
The Hidden Work Behind a High-End Archival Print
Written by Sukla ChinnappaTwo prints on a table. Same photograph. One came from a mall kiosk for a few hundred rupees. The other cost several times that — and the person who made it took days. Same image. So why the gap?
The easy answer is "better paper." The easy answer is wrong.
You're not paying for paper. You're paying for everything that happens before the paper — and everything engineered to make it outlast you. Let me walk you through where the money actually goes.
If you want the case for printing from behind the camera, this is a good watch before we get technical:
The print is the last five percent — and the hardest
A file that looks perfect on your phone is not a print. Screens glow. Paper reflects. Your phone shows you light passing through glass; a print shows you light bouncing off a surface. Two different kinds of physics.
Getting an image to survive that translation — to look on paper the way it looked in your head — is the whole job. And it's where most of the cost hides, because none of it is visible in the finished frame.
How to Smile for Photos: The 80/20 Method PRO-Photographers Use
Written by Artriva Studios"Say cheese" has produced more bad photographs than any camera ever has. It gives you a mouth shape — teeth bared, cheeks lifted — without the one thing that makes a smile a smile: something behind it.
Everyone knows the result. The photo where you're technically smiling and somehow it still isn't you. Eyes flat, jaw a little clenched, an expression you'd never make in real life because in real life, expressions aren't made — they happen.
This post is about how genuine smiles — the relaxed, teeth-showing, eyes-alive kind — actually get made in photographs. Not with tricks or filters, but with a two-step method any good portrait photographer should be running: one step for the body, one for the face. And a hundred-year-old economics principle explains why the method works so well.
Archival Prints Explained: Inks, Media, and Why Your Best Photographs Deserve Them
Written by Artriva StudiosYour best photographs deserve better than a phone screen. But walk into most photo labs asking for "a nice big print" and you'll get a glossy sheet that mirrors every tubelight in the room, shifts colour within a decade, and looks exactly like the poster shop's output next door. There is an entirely different tier of printing — archival fine art printing — and once you've seen your work on it, the difference is not subtle. This post explains what "archival" actually means, why the ink system matters more than the printer's brand name, and how to choose between the media available — canvas, cotton rag, baryta, etching papers and more.
A note on why we care enough to write this: the photography we practise is deliberately clean — controlled light, quiet backgrounds, nothing in the frame that doesn't serve the subject. That style is made for archival printing. A calm, elegant image on a zero-reflection fine art paper reads like an object, not a photo. A cluttered, noisy frame on the same paper just reads as expensive clutter. The print medium rewards restraint, which is exactly the argument for shooting with restraint in the first place.
How to start a modelling career for women (Indian Edition)
Written by Artriva Studios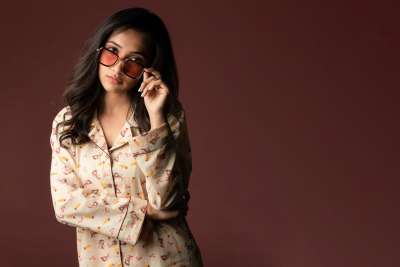
Nobody gets discovered at a mall. For the working majority of female models, the career starts far less cinematically: a set of honest photographs, an organised folder, a kit bag packed the night before, and a reputation for turning up on time, prepared, with clean heels and a base that matches her neck. This guide covers exactly that groundwork — including three things most "how to become a model" articles skip entirely: what undergarments to build your shoot kit around, which footwear actually earns its place in your bag, and why learning to do your own camera-ready makeup can directly raise what you earn per day.
Having photographed models on both sides of the equation — testing new faces and hiring models for commercial and e-commerce shoots — I've watched the same pattern repeat for years. The women who build steady careers are rarely the most striking in the room. They are the best-prepared, the most reliable, and the most honest with themselves about which part of the market actually books their look. Let's build your starting kit, piece by piece.
A practical guide for men starting a modelling career — digitals and polaroids, portfolio organisation, comp cards, posing practice, pricing, professionalism, and parts modelling
Written by Artriva Studios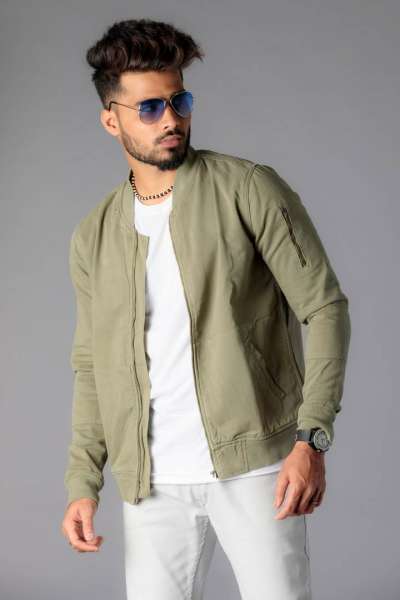
Nobody scouts you at a coffee shop. That story makes for a good interview answer, but for the other 99% of working male models, the career starts the unglamorous way: a set of honest photos, a well-organised folder, a phone that gets answered, and showing up on time with clean shoes. This guide covers exactly that — the practical, boring, career-deciding groundwork.
Having photographed models on both sides of the equation — testing new faces and shooting commercial campaigns where models are hired — I have watched the same patterns repeat. The men who build steady careers are rarely the best-looking ones in the room. They are the best-organised, the most reliable, and the most honest about where they actually fit in the market. Let's build your starting kit, piece by piece.
You've seen it. The slow-motion pan across light stands. The photographer crouching, adjusting, gesturing. A lens cap tossed in the air. Cut to music.
It looks impressive. That's the point.
Behind-the-scenes content is now one of the most reliable formats on social media — and for good reason. It feels honest. Unscripted. You're watching someone actually work, not watching an ad. Your guard drops.
But here's a quiet question worth sitting with: what exactly did that video tell you about the final photographs?
Photoshop Refused to Open — Here's the One Thing That Actually Fixed It
Written by Sukla ChinnappaIt Started With v27.7
Photoshop had been running fine. Then an update landed — v27.7 — and that was the end of it.
The splash screen would appear. "Measuring Memory." And then — nothing. No crash dialogue. No error. The application simply ceased to exist. Task Manager showed no trace of it.
I assumed it was the update. Updates break things. It happens.
So I rolled back. Tried v27.6. Same behaviour. Tried a clean reinstall of 27.7. Same. Tried 27.8 when it dropped, hoping Adobe had quietly fixed something. Same again. (The only last working version was 26.11.6 and earlier)
At this point the obvious culprits had been exhausted — reinstalls, driver updates, cache clears. The kind of things that usually work. None of them did. (even the official support gave up and told me to get in touch with adobe)
Why AI Can’t Replace the Human Touch in Photography - Especially for Corporate Headshots
Written by Artriva Studios
In an age where Artificial Intelligence (Ai) can generate remarkably realistic portraits in seconds, it’s easy to assume professional photography might soon become obsolete. But if you’ve ever stood in front of a real camera — with the lights set perfectly and a photographer guiding you through the moment — you know it’s not the same.
Ai can replicate appearances.
It can create near-perfect skin, balanced lighting, and even believable smiles.
But what it cannot do is see you.
The Beauty of Imperfection
Real faces have stories. A slight asymmetry in your smile, the fine crinkle near your eyes when you’re genuinely amused, or that subtle shift in your lips & facial muscles when you think — these minute movements are what make us human.
It’s fascinating how our faces are in constant motion — even when we’re “still.” Tiny muscle groups around the eyes, mouth, and forehead are always adjusting to emotion, thought, and energy. These micro-expressions last fractions of a second, yet they’re powerful enough for another human to read them and instantly feel connection, comfort, or trust. A master photographer watches for these cues — the half-second before a smile, the slight breath before a laugh, the moment your shoulders relax. That’s when the camera clicks. Those are the frames that carry life.
Ai, on the other hand, doesn’t see motion; it renders patterns. It smooths out texture, equalises asymmetry, and “perfects” skin until it loses the very soul of expression. What Ai perceives as a flaw — a laugh line, a scar, a small unevenness — is actually what tells your story.
Real light interacts with real skin — it falls softly on pores, bounces off the fine texture, and shifts gently as you move. Today’s professional cameras pick up that nuance — the difference between light on living skin versus light on a simulation. Those microscopic gradients, those imperfect transitions, are what make a photograph breathe.
A perfect image might impress.
A real image connects.
& connection is what every great portrait is truly about.
When we as professional photographers capture you in your element — calm, focused, approachable, or driven — what we’re really capturing is your personality, exactly how another human perceives you.
Capturing Kids Naturally: A Photographer’s Guide to Fun, Stress-Free Photoshoots for Ages 1–7
Written by Sukla Chinnappa
Photographing toddlers and young children is one of the most rewarding things I do as a photographer — and also the most unpredictable. One moment they're giggling, the next they've decided shoes are optional and they're running in the opposite direction, or crying uncontrollably!
But over the years, I've learned a simple truth:
Young children aren't "misbehaving"… they're discovering independence.
A 2-year-old buckling their own shoe…
A 4-year-old insisting "I'll do it!"…
A 6-year-old choosing which colour shirt to wear…
They're learning new skills every day — and to them, every new ability means "I'm big now. I can decide." This isn't my opinion as a photographer; it's simply where children are, developmentally, between one and seven. The entire job of those years is building a sense of "I can do things myself." A photoshoot that takes that away — sit here, look there, smile now — is working directly against the one thing the child cares most about that day.
If we understand this, we stop trying to control the photoshoot and start designing it so the child feels in charge.
The secret to a successful photoshoot?
Make it feel like the child's idea.
Before the Tips — What Are We Actually Trying to Capture?
One thing before the step-by-step, because it shapes everything that follows.
Every child has expressions that belong to them alone. The particular way one girl scrunches her nose right before she laughs. The exact tilt of a boy's head when he's deciding whether to trust you. The look of fierce concentration a four-year-old wears while "fixing" something. No posing guide produces these — they only appear when a child forgets the camera exists and becomes fully themselves.
And here's why that matters more than anything else in this post: a posed, say-cheese photo shows what your child looked like. An unguarded expression shows who your child was. The first one is nice for a week. The second one is the photograph you'll stop in front of, on your own wall, fifteen years from now — when that nose-scrunch has long grown into something else — and feel the whole of that age come rushing back.
We're not shooting for a social media feed here. Feeds scroll past and disappear. We're shooting for the frame in the living room, the print by a grandparent's bedside — images that will be looked at for years and decades, long after every phone in the house has been replaced. That's the standard every technique below is built to serve.
Here's how we do it — step by step.
1. Involve the Child from the Start
Instead of telling them what to do, involve them right from the planning stage. Invite them into the process with simple choices.
Instead of: "Sit here."
Try: "Do you want to sit on the chair or stand like a superhero?"
Instead of: "Wear this."
Try: "Do you like the blue shirt or the red one?"
Kids love having power. When they choose, they commit.
Why this works: notice that both options lead somewhere I'm happy with — the choice is real to the child, but the frame is safe either way. Psychologists call this offering "bounded choice," and parents use it instinctively at dinner time ("carrots or beans?"). It satisfies the child's hunger for independence without handing over the whole session. A child who has made two or three choices already feels like a partner in this project — and partners cooperate, because it's their project failing if they don't.
Mini story: I once asked a little girl where we should start. She pointed at a random corner and said, "There!" I said, "Great idea!" and walked her there. Two minutes later, I had earned the space to ask, "Will you like this?" (showing her a quick look on my camera). Because I respected her choice first, she happily listened later. In short — you are building a partnership.
2. Turn Posing into Play (No Commands!)
Children don't pose — they pretend, play, copy, and imagine. So instead of rigid instructions, I use playful prompts:
"Can you show me your cute cute smile pleaseee?"
"Oooh! How cute you look sitting like that!"
"Should Teddy sit on your lap or on your head?"
"Can you show me how you hug your toy?"
"Do you want to try this cool jump?"
It feels like a game, not a task. And the expressions? 100% real.
Why this works: play is not a distraction from a child's "real" behaviour — play IS a child's natural language. A command ("smile!") asks a child to manufacture an expression on demand, which even adults do badly. A game produces the expression as a side effect — the child is busy being a superhero or balancing Teddy on their head, and the delight on their face is genuine because the delight is genuine. This is the entire difference between a photo that looks like your child and a photo that IS your child.
Remember to be a kid at this play yourself, and plan your steps ahead — this is what professional photographers learn and master over time: playing along wholeheartedly while quietly staying two moves ahead with framing and light.
3. Use Positive Reinforcement (It Works Like Magic)
When a child feels proud, they'll do anything again. Instead of correcting, I celebrate:
"Wow, you did that all by yourself!"
"That was PERFECT — can we do it again?"
"You're so fast! I almost missed it!"
"That smile is my favourite!"
And immediately… they repeat it with even more excitement.
Why this works: behaviour that gets celebrated gets repeated — that's as close to a law of childhood as anything I know. But there's a photography-specific bonus hiding in "can we do it again?": the repeat of a spontaneous moment is often better than the original. The first jump surprised even the child; the second jump, they're performing proudly for an appreciative audience, chin up, eyes bright. I get multiple chances at the moment, and the child's confidence grows visibly frame by frame. Correcting does the opposite — one "no, not like that" and you can watch a child fold inward. It takes ten celebrations to undo one correction, so I simply never correct.
4. Keep Distractions (Especially Phones) Away
One of the biggest challenges isn't the child — it's the phone in the parent's hand. The moment a parent takes out a mobile or starts recording from the side, the child wants it. Attention is gone.
Before the shoot, I gently ask: "Let's keep mobiles out of sight so your child stays fully engaged. They look at you for cues — if you're involved and smiling, they'll do the same!"
Replace the phone with: laughter, clapping, singing, playing along.
Why this works: young children read the room through their parents — it's called social referencing, and it's how they decide whether a new situation is safe and fun. A parent absorbed in a screen sends the signal "this isn't important," and the child's engagement drains within a minute. A parent laughing and clapping just behind me sends the opposite signal — and gives the child somewhere warm to direct those expressions. Many of the best "looking just past the camera" portraits in my galleries are actually a child beaming at their own mother, three feet to my left. The phone version of that moment simply does not exist.
5. Bring Their Favourite Toy (It's More Than a Prop)
A beloved toy isn't just a cute accessory — it's comfort, identity, and storytelling.
I often ask:
"What do you want to tell Teddy?"
"Can your car go fast or SUPER fast?"
"Should Bunny sit with you or fly in the sky?"
"Can you show me how you play with _____?"
Give time, and allow them to forget about the camera and start being themselves. Those are the moments worth capturing.
Why this works: a familiar toy is what child psychologists call a comfort object — a piece of home the child carries into an unfamiliar studio. It lowers their guard faster than anything I can say. But the deeper value shows up years later: that specific bunny, that particular battered car, was this exact chapter of your child's life. Toys get outgrown and quietly disappear. A photograph of your child mid-conversation with a toy they adored is a double portrait — the child and the era. Parents rarely realise at the shoot how much that detail will mean at year fifteen. I've had parents tear up over the toy in the frame as much as the face.
6. Let Them Show Off Their New Skills
Kids LOVE proving how "big" they are. Let them!
"Can you jump higher than me?"
"Show me your newest dance move!"
"How fast can you run to the tree and back?"
"Can you balance on one foot?"
They beam with pride — and I capture pure joy in motion.
Why this works: this taps the exact developmental engine driving the whole age group — the drive to demonstrate competence. A child showing off a new skill produces an expression that cannot be requested: genuine pride. And here's the long-view reason I chase these frames — the skill itself is a timestamp. The wobbly one-foot balance, the brand-new dance move, the jump that barely clears the ground: these are abilities measured in months. In the print on your wall, that wobble is precisely what says "this was them, at exactly four and a half." A generic smile could be from any year. The wobble could only be from that one.
7. Turn the Shoot into a Mini Adventure
When a session feels like a game, cooperation happens naturally.
Some fun themes: explorer looking for treasure · superhero on a mission · freeze/unfreeze game · "the floor is lava!" · "can you tiptoe like a sneaky cat?"
The more imagination, the better the expressions.
Why this works: a story gives the session a spine. Without one, a shoot is a series of disconnected requests, and every new request is a fresh chance for "no." Inside a story, the next thing simply happens — of course we tiptoe now, we're sneaking past the sleeping dragon. Each child also inhabits the same story completely differently: one explorer is cautious and wide-eyed, another charges in sword-first. The adventure isn't just keeping them busy — it's drawing out their version of brave, careful, mischievous. That individuality is the whole prize.
8. Parents: Cheerleaders, Not Directors
Parents are incredible helpers… when they support rather than instruct.
What works best: stand behind or beside me · laugh, clap, encourage · let me lead with the playful prompts · trust the process.
If a parent says, "Smile! Look here! No, do this!" the child shuts down.
If the parent says, "Wow! You're doing great!" the child lights up.
Why this works: when two adults give a child instructions at once, the child freezes — which voice to obey? And a parent's correcting voice carries far more weight than mine, because the child cares infinitely more about their parent's approval. One sharp "no, not like that" from Mom outweighs twenty of my games. So the division of labour matters: I supply the play, you supply the applause. And I say this with warmth, not criticism — the directing instinct comes from love and from wanting your money's worth from the session. I promise you'll get it. The route there is just your delighted laughter, not your directions.
9. Keep Sessions Short & Flexible
Children have limited attention — and changing energy. That's why I plan several mini activities instead of one long setup. When a child is in the mood, I follow their lead. When they're tired, we pause or change the game.
Flexibility > Perfection.
Why this works: a young child's genuine engagement runs in short bursts — a few strong minutes at a time, not an hour on demand. Fighting that produces exactly one thing: the glazed, done-with-this expression that ruins every frame it appears in. Working with it means treating the session as five or six small windows, with wandering and snacks in between. Some of my favourite frames have come during the "break" — the child relaxed, unwatched, being completely themselves — while I quietly kept shooting. The schedule serves the child; never the reverse.
10. End on a Positive Note
The final feeling shapes the memory.
At the end, I often: show them a photo — "Look! That's YOU!" · give a high-five · let them click a photo with my help · say, "You were amazing today!"
They leave proud and excited — often asking, "Can we do it again?"
Why this works: we don't remember experiences evenly — we remember how they peaked and how they ended. A session that finishes with pride and a high-five gets stored, in the child's memory, as "photoshoots are fun." That's not just a kindness; it's an investment. The next session — a year from now, three years from now — starts with a child who walks in already trusting the process. Families who photograph their children regularly through these years end up with something genuinely rare: an honest, joyful record of a person growing up, made by a child who wanted to be there every time.
Why All of This Matters — The Photo on the Wall
Young children don't resist photoshoots because they're difficult. They resist because they want independence — and we often take it away. But when we invite them to participate, when we use choices, praise, play, imagination, and patience — they don't just cooperate. They shine.
And here is the thing I most want parents to take from this post: the reason for all of this patience is not a smoother session. It's what ends up in the frame.
Every technique above exists to reach the same destination — the moment your child forgets the camera and their real, unrepeatable self surfaces. The expressions that emerge in that moment belong to your child alone. They were never posed, so they can never be reproduced. And that is exactly what makes those images grow more precious with time instead of less: children change so fast that within a couple of years, that laugh, that head-tilt, that fierce little frown of concentration exists nowhere except in the photograph.
A perfectly posed picture gets a compliment and gets scrolled past. But the honest one — the one where it's unmistakably your child being exactly who they were at three, or five, or seven — that's the one that earns a frame on the wall or a place by a bedside, and stays there for decades. Long after phones and feeds have moved on, that print keeps doing its quiet work every single day.
The best kid photos don't come from perfect poses.
They come from letting them be fully, wonderfully themselves.
And that's the magic worth capturing — not for a week of likes, but for a lifetime on the wall.
What Steve Jobs' Iconic Portrait Teaches Us About Great Headshots
Written by Artriva StudiosEvery few months, someone walks into our studio, opens their phone, and shows me that photograph — Steve Jobs, black turtleneck, hand to his chin, looking straight through the lens. "Can we do something like this?"
It's a fair ask. It's also the most instructive question a client can bring, because the honest answer is: yes — but not for the reason you think. The magic of that portrait was never the lighting. To understand what actually made it, you have to hear the story of the twenty minutes in which it was taken. And once you've heard it, you'll understand what separates a great headshot from the disappointing ones so many people in Bengaluru have paid for.
More...

With the spread of COVID-19 and the subsequent lockdowns across the globe virtual meetings and gatherings have become the new norm, resulting in a huge surge in demand for webcams and prices several times the MRP/MSRP. With the lockdown also brought much of our photography business to a standstill, the biggest pinch we felt was the lack of a webcam (i do remember having a decades-old, low-resolution webcam somewhere with the broken mount - hence the "somewhere bit")
We did manage a while with workarounds using 3rd party software and a screen-capture of onscreen live-view video from my cameras(DSLRs)
All this changed by this awesome announcement by Cannon
- Using Canon dSLR as a Webcam
- dSLR as Webcam
- dSLR webcam
- SLR webcam
- Mirrorless as webcam
- Mirrorles camera as webcam
- How to use dSLR with zoom
- dSLR camera with ZOOM
- dslr with Microsoft Teams
- Using dSLR with Microsoft Teams
- dslr for Zoom
- dSLR for Microsoft Teams
- dSLR as camera for ZOOM
- dSLR as webcam for Microsoft Teams
- dSLR as webcam for Google Meet
- use my dSLR as a webcam
- how to convert dSLR into webcam
- connect dSLR to Zoom
- connect dSLR to Microsoft Teams
- connect dSLR to google Meet
- dSLR as webcam on MacOS
- dSLR as webcam in Catalina
- dSLR as Webcam in Mojave
- dSLR as Webcam in High Sierra
- dslr for skype
- ddslr for adobe Character Animator

Organising and executing your own studio session is affordable!
It is one of the best ways to take your photographic skills to the next level.
The primary advantage of shooting in a studio is the ability to control and shape the quality of light. Outdoors, you work with whatever the sun and the weather give you that hour. In a studio, every ray of light exists because you decided it should — its direction, its softness, its intensity, its colour. Photography is, quite literally, drawing with light; a studio is the one place where you hold the entire pencil.
And here's the part that surprises most people: studio lighting is the great equaliser of camera gear. Under controlled studio light, even entry-level and cropped-sensor cameras render sharp, clean, well-detailed images. Why? Because studio flash removes the two things that force cameras to struggle — low light and movement. With ample flash power you shoot at your camera's base ISO (its cleanest setting), and the flash burst itself is so brief that it freezes motion far better than a fast shutter alone. The technical gap between a beginner's camera and a flagship narrows dramatically the moment both are under the same strobes. What remains is the photographer's eye — which is exactly the skill worth building.
All of this control traditionally meant owning a large space and a serious pile of equipment — a hefty price to buy, and a running cost to maintain. Renting removes that barrier entirely: full studio capability, paid for only on the days you actually use it.
Whether that matters to you depends on who you are — so let's take this by skill level, and then talk to the people on the other side of the camera too.
If You're Just Starting Out: The Fastest Classroom in Photography
A single well-planned studio session will teach you more about light than months of shooting outdoors. That's not an exaggeration — it's about how learning works.
Outdoors, the light changes every few minutes: a cloud moves, the sun drops, you change position. You can never be sure whether a photo improved because of what you did or what the sky did. In a studio, everything holds still except the one thing you change. Move the light closer — see exactly what happens. Add a softbox — see exactly what changes. One variable at a time, instant feedback on a tethered screen or camera back. That tight feedback loop is precisely how skills form, and it's why photographers who spend even a handful of sessions in a studio suddenly start "seeing" light everywhere — including outdoors.
The rental model fits beginners perfectly: you get access to lighting worth several lakhs without buying anything, and you find out what kind of equipment you actually like before spending on your own. Think of early studio rentals as trying on gear as much as making photos.
One tip from years of watching first-timers: look for studios run by photographers who also teach. An assistant who can show you why a light is placed where it is turns a rental hour into a masterclass. (It's something we deliberately offer — an assistant is included with our studio rentals to get you productive in the shortest possible time, and there's no faster way to learn than setting up alongside someone who does this daily.)
If You're Building Skills and a Portfolio: Rent to Grow
You've done a few sessions, you know your way around a softbox, and now you want portfolio work — headshots, portraits, small fashion tests, product experiments. This is the stage where studio rental earns its keep in a different way: consistency and repeatability.
A portfolio shot outdoors is hostage to weather and daylight hours. Studio work can be scheduled any day, any time, and — crucially — reproduced. Nail a lighting setup you love? Write it down, and it's yours forever, identical on every future shoot. Clients and agencies notice this consistency in a portfolio; it reads as professionalism long before anyone asks about your gear.
This is also the stage for testing before investing. Thinking of buying strobes? Rent a studio that runs the brand you're eyeing and put it through a real shoot. A few hundred rupees of rental time has saved many photographers from lakhs of buyer's remorse. Studios can also usually source specialised extra equipment from rental vendors at better prices than you'd get walking in yourself — ask.
If You're a Working Professional: Do the Math Before You Sign a Lease
Every working photographer eventually asks: should I get my own studio? Here's the honest arithmetic — the same cost logic we've written about in our pricing guide.
An owned or leased studio is a fixed cost: rent, electricity, maintenance, equipment upkeep — payable every month whether you shoot thirty days or three. Renting converts all of that into a variable cost: it exists only on the days a paying job exists, and it can be billed directly into that job's quote as a clean line item. Until your studio-based bookings are frequent enough that a month of rentals reliably exceeds a month of lease-plus-overheads, renting is not the compromise option — it's the financially correct one.
Renting also solves problems ownership can't:
- Overflow and scale: your own space is too small for that one campaign with a full crew? Rent the bigger space for that job only.
- Location flexibility: a client on the other side of the city becomes bookable when you can rent near them instead of dragging them across Bangalore traffic.
- Zero maintenance drag: modelling lamps age, backdrops tear, flash tubes fail. In a rented studio, that's someone else's capital expense — you always walk into working equipment.
Tips for Renting a Studio Space
While finding a studio is relatively easy, there are a few things to check before making a booking — each of these exists because someone learned it the expensive way:
- Rates: rates vary greatly from studio to studio — but so does the method of counting time and what's included. Double-check how fractions of a day are charged and exactly which equipment comes with the plan. Two studios quoting the same hourly rate can differ by thousands once setup time and gear add-ons are counted.
- Size: studios come in a range of sizes, and this directly drives cost — but bigger genuinely buys you creative room. Distance between subject and backdrop is what lets you control background falloff and avoid spill; a cramped space forces every light to do two jobs badly.
- Hidden charges: beware of extra charges and taxes — the classic being consumables like backdrop paper, billed per metre used or "damaged." A cheap hourly rate with padded consumables can quietly out-cost an honest all-inclusive one.
- Overtime: most studios charge a premium for overtime, and shoots overrun more often than not. Know the overtime rate before you book, plan your session with a buffer, and look out for studios offering gentler pricing on extended hours.
- Equipment hire: standard equipment is usually included, but many studios charge per additional piece — and no studio has everything. You're always expected to bring your own camera and recording media. For anything specialised, ask the studio to source it; they typically get better vendor prices than a walk-in customer.
- Assistant / tutoring: some studios offer an assistant to help you set up — for beginners this is the single most valuable inclusion on the list, worth more than any gear upgrade. It's the difference between spending your first paid hour fumbling with stands and spending it shooting.
Setting Up the Shoot
So let's assume you've found a studio, the rate looks good, and it's free at a convenient time. What's stopping you from booking?
Probably that healthy fear of failure! But with preparation and planning, there's no reason to delay any longer. Here's how to execute your first session with ease:
Talent: the top item on your list is someone to photograph. A professional model contributes real value — but for a first session, it isn't essential, and honestly isn't ideal. Start with someone interesting whom you're comfortable with: a friend, an upcoming artist, another photographer. Here's why this matters: in your first session, your attention will be consumed by lights, settings, and the unfamiliar space. A friend forgives the fumbling; a paid professional's time ticking away adds pressure you don't need yet. Save booking a model for your second session — by then the basics will be muscle memory, and you'll actually be able to direct.
Working with your model: it's easy to forget your model is a real person. Taking time to get to know them before shoot day makes a huge difference — involve them in planning, include their ideas and requests, and they'll arrive invested in the session rather than just present at it. On the day, keep talking, and whatever you do, avoid hiding behind the camera. A silent photographer reads as a dissatisfied one, and the model's confidence — and expressions — drain accordingly. (This is the same principle we use with camera-shy portrait clients: the conversation is part of the craft.)
Lighting: the most time-consuming part of any shoot is the lighting setup, so walk in with a plan. Prepare two or three setups depending on your booked time — the internet is full of diagrams and tutorials. Pick something simple: a single-light setup, a classic headshot, a plain-backdrop portrait. The reasoning is the same one-variable principle from earlier — a simple setup you understand teaches you more (and photographs better) than an elaborate one you're guessing at. Master one light before adding a second; every additional light multiplies complexity, not quality.
Make it a team event: if possible, share the session with a fellow photographer. Costs get split, setup goes faster, one person can adjust lights while the other shoots, and someone keeps the model engaged between setups. There's also a quieter benefit: watching how another photographer approaches the same subject in the same light is one of the fastest ways to discover your own preferences.
And If You're Not a Photographer at All — Why a Studio Portrait Is Worth It
Most of this post speaks to photographers. But there's another reader we meet in our studio every week: someone who simply wants a genuinely good portrait — of themselves, their parents, their family — and is wondering whether a studio session is worth it when everyone has a phone camera at home.
Here's the honest case, from the client's side of the lens:
Controlled light is the most flattering light there is. Studio lighting is shaped deliberately for the person in front of it — softened, angled, and balanced to flatter the actual structure of your face. This is not vanity or heavy editing; it's the same face, simply lit with intention instead of chance. It's the difference you can't quite name when you see a truly professional portrait — and it cannot be replicated by a phone in a living room.
A studio portrait doesn't date. A photo taken against your sofa is stamped with that sofa, that paint colour, that year's clutter. A clean studio portrait — a classic backdrop, timeless light — belongs to no particular year. That's precisely why formal portraits from decades ago still look dignified today, and it's what makes a studio portrait the right candidate for a print that hangs on a wall for twenty years rather than a file that disappears into a phone's camera roll.
The occasion deserves it. A milestone birthday, grandparents while they're in good health, a family complete for a rare few days when everyone's in the same city — these deserve better than a hurried phone photo. A studio session takes an hour or two; the print outlives every device you currently own. Some of the most treasured photographs in any family are formal studio portraits of earlier generations. Someone made time for those. This is your generation's turn.
If that's you, you don't need to know a softbox from a shoebox — that's entirely our job. Come in for a session, and bring the people who matter.
The Short Version
A studio is where light stops being luck. For a beginner, renting one is the fastest classroom in photography. For a growing photographer, it's consistency, portfolio quality, and a way to test gear before buying it. For a professional, it's the financially sensible alternative to a lease — until the bookings genuinely justify one. And for everyone else, it's where portraits are made that still look right on a wall decades later.
The space and equipment are the affordable part. What you build in them — skill or a family heirloom — is up to you.
What to check before booking a Photo Studio for your next project
Written by Artriva Studios
Chances are that you are a budding photographer, business owner or a marketer trying to get an idea what to expect in a photo studio for your upcoming shoot. Typically a photographer would arrange this for you, but most often they offer you their own studio, even if sometimes their studio might not the right fit for the scope of the project.
Some planning and a well-equipped studio can greatly simplify your logistics and can mitigate most hiccups related to your project. As not all studios are created equal as the available ones vary from makeshift spaces to custom purpose-built spaces & everything in between. Some studios may also be better suited for a particular genre/style of photography than others hence the importance to select the right studio for your needs.
Call for Models for our Photography Workshops
Written by Artriva Studios
Greetings,
We are happy to now announce that we are now offer workshops on studio lighting. These workshops and tutoring sessions are offered not just offered as group classes, but also as personal workshops. A unique advantage with Artriva's Photography workshops is the amount of time available to the participants for hands on practice and the opportunity to shoot with both Professional & Amaetuer Models to get a good start for their portfolio & getting a hold on .
This combined with small batch sizes ensures that learners do get ample time to learn and test out their creativity. Models on the other hand have the following advantage.
- This will be a Paid assignment for well experienced models.
- New Models get an opportunity to add photos to their portfolio, plus contacts of upcoming photographers.
Do look at some of the photographs shot during one of our previous workshops
How to apply ?
Models need to fill up the following form(s) on our website.