
Why LinkedIn Is Quietly Ruining Your Profile Photo & How to Fix It
Written by Artriva Studios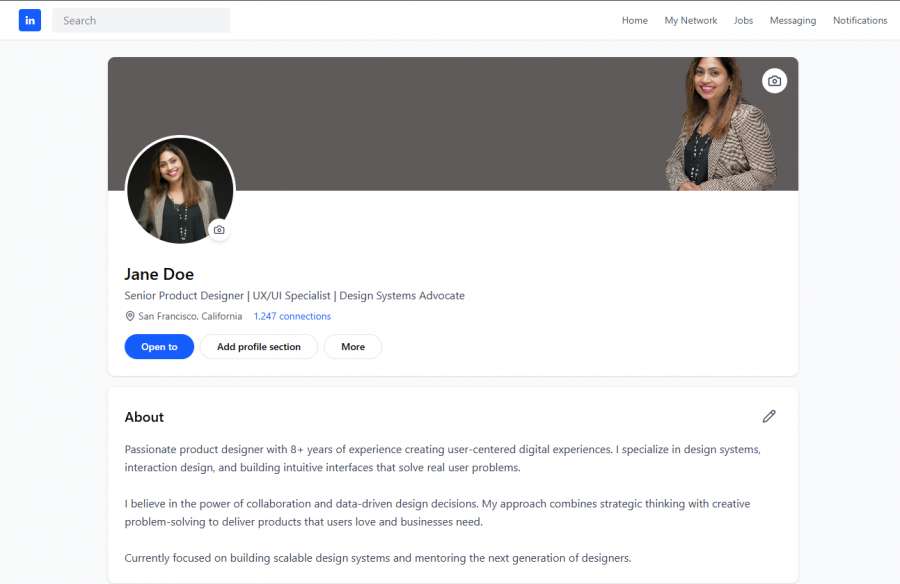
You paid for a professional headshot. It looked incredible on your photographer's screen. Then you uploaded it to LinkedIn & something died in the process.
The grays went muddy. The blacks crushed. That clean, seamless gradient behind you? Now a blocky mess of compression artifacts. Your crisp, confident portrait now looks like it was saved off an old Nokia and screenshotted twice for good measure.
It's not the photo's fault. It's LinkedIn's aggressive image compression algorithm — and it has no mercy for gradients, subtle tonal transitions, or finely detailed backgrounds.
The good news? Once you understand why this happens, you can work around it entirely. Here's exactly how.
Why LinkedIn Compresses Your Profile Image So Aggressively
LinkedIn scales and recompresses your profile photo the moment you upload it. The platform targets a very small file size to serve images quickly across millions of profiles, across devices, and across slow mobile connections. The result is a JPEG compression pass that strips out subtle tonal information — particularly in shadows and dark mid-tones.
Gradients are especially vulnerable. A smooth gradient is, at the pixel level, a huge amount of unique colour data. JPEG compression approximates this data in "blocks," and when those blocks get aggressive enough, you see the tell-tale stair-stepping effect — what photographers call banding or compression artifacts.
The Core Problem
LinkedIn's compression drastically reduces the dynamic range of your image — i.e. the subtle difference between a deep charcoal and a true black, or between a warm mid-grey and a cool one. These tonal nuances are what make a professional photograph feel three-dimensional and alive.
When they're lost, the image looks flat, murky, and amateurish — regardless of how well it was shot.
What to Avoid When Shooting (or Choosing) Your Profile Photo
Before you even think about export settings, the image itself needs to give compression as little to destroy as possible.
- Avoid strong gradient backgrounds. Seamless paper washes that travel from dark to light, and heavy vignettes, are compression's favourite targets. They look stunning in print or on a high-resolution screen and fall apart on LinkedIn. (A very subtle, gentle gradient can survive — it's the large luminance shifts that band badly.)
- Go for solid, flat background colours. A clean white, a neutral mid-grey, or a solid dark tone compresses far better because there's almost no tonal variation for the algorithm to destroy. What you see is what you get.
- Keep the background simple if you're shooting against a wall or natural environment. Busy textures behind you can also introduce noise that worsens under compression.
NOTE: A solid background is not a compromise — it is a deliberate choice that communicates confidence, clarity, and professionalism. The world's most iconic corporate headshots use solid or near-solid tones. There is a reason for that.
Workflow to Optimise Your LinkedIn Profile Image for Upload
Your goal is to hand LinkedIn a file that's already so small and compressed that the platform's own algorithm has very little left to destroy. This is counter-intuitive — you're intentionally reducing quality before upload — but the result is a sharper, more consistent final image than if you'd uploaded a high-resolution file and let LinkedIn do the work.
- Figure Out Your Crop First: Before touching export settings, decide exactly how your photo will be framed as a circular profile thumbnail. LinkedIn crops to a circle, so make sure your face is centred, your eyes land in the upper third, and there's breathing room around your head. Do this in your editing or export software — not in LinkedIn's built-in crop tool.
- Export at ~600 pixels: You don't need a large file — LinkedIn will resize it anyway. Exporting at 600–800 pixels gives the algorithm far less pixel data to mangle. Anything larger is just handing the compression engine more information to approximate poorly.
- Lower Quality Until You Get a File Under 50 KB: This is the part most people get wrong. Using a tool that gives you granular control over JPEG quality — GIMP, Photoshop's legacy "Save for Web" tool, or Affinity Photo — reduce compression quality incrementally. Your target is a file under 50 KB. Tweak both the resolution and the compression quality slider until you land there. A well-shot photo on a solid background handles this beautifully.
- Upload Directly, Skip LinkedIn's Adjustments: Once you've cropped and exported, upload the final file and leave LinkedIn's positioning tool alone as much as possible. Zooming or repositioning inside their interface means your image gets resampled again before saving. Your image is already cropped correctly — confirm and move on.
PRO TIP: Before uploading, zoom your exported file out to roughly thumbnail size — about the size of your thumbnail on the screen — and squint. That's how most people will actually encounter your photo: 48 pixels wide, next to a comment in a feed. If your face doesn't read clearly at that size, recrop tighter. No export setting fixes a crop that's too loose.
Why "Export for Web" Tools Make a Difference
Most photo export workflows are built for print or high-resolution digital use — they preserve maximum data. "Export for Web" tools, by contrast, are designed to make the smallest possible file while keeping the image perceptually clean to the human eye.
Photoshop's legacy Save for Web tool (File → Export → Save for Web, or the keyboard shortcut Alt + Shift + Ctrl + S on Windows / Option + Shift + Cmd + S on Mac) gives you a live side-by-side preview of quality vs. file size. GIMP's "Export As" dialog gives you similar granular JPEG quality controls. Use the preview. Trust your eyes. Keep reducing until you hit under 50 KB — you'll likely be surprised how clean it still looks at that size, especially on a solid background.
Frequently Asked Questions
- Does image format matter — should I use PNG instead of JPEG?
- PNG is lossless and will be larger in file size. LinkedIn compresses it regardless during upload — and a large PNG gives the algorithm more to aggressively compress. A well-prepared JPEG under 50 KB, processed in a controlled export environment, will almost always outperform a large PNG that's been compressed by LinkedIn's servers on arrival.
- What's the minimum safe resolution for a LinkedIn profile image?
- LinkedIn displays profile images at sizes ranging from a tiny 48×48 px thumbnail in notifications all the way to 400×400 px on your profile. An export at 600 px gives comfortable headroom above the maximum display size while remaining small enough to minimise LinkedIn's re-compression damage.
- I don't have Photoshop. What free tools can I use?
- GIMP (free, open-source, Windows/Mac/Linux) has a fully functional "Export As" dialog with JPEG quality control. Squoosh (browser-based, free) is another excellent option — it gives you a real-time comparison of file size vs. quality and supports JPEG compression control. Both are more than capable of handling this workflow.
- My photo was taken on a gradient background. What should I do?
- A subtle, gentle gradient may survive — but a large shift in luminance (a background that travels visibly from dark to light) will band badly under LinkedIn's compression, no matter how carefully you export. Consider reshooting — or at minimum, have a professional editor replace the background with a solid tone. The photograph itself may be excellent; the background choice is simply working against it on this particular platform.
Skip the Guesswork — Get a LinkedIn-Ready File When You Book Your Headshot
When you book a corporate headshot session with us at Artriva Studios, we don't just hand you a retouched file and wish you well. Ask us during your session and we'll prepare your LinkedIn-optimised export — the right crop, the right size, the right compression — ready to upload the moment you walk out.
Your profile photo is doing a job. Let's make sure it's doing it well.
View Our Corporate Headshot Packages

Latest from Artriva Studios
- Matrimonial Photos That Feel Like You: Comfort Over Posing
- How to Smile for Photos: The 80/20 Method PRO-Photographers Use
- How Professional Photography Quietly Improves Your SEO
- Archival Prints Explained: Inks, Media, and Why Your Best Photographs Deserve Them
- How to start a modelling career for women (Indian Edition)