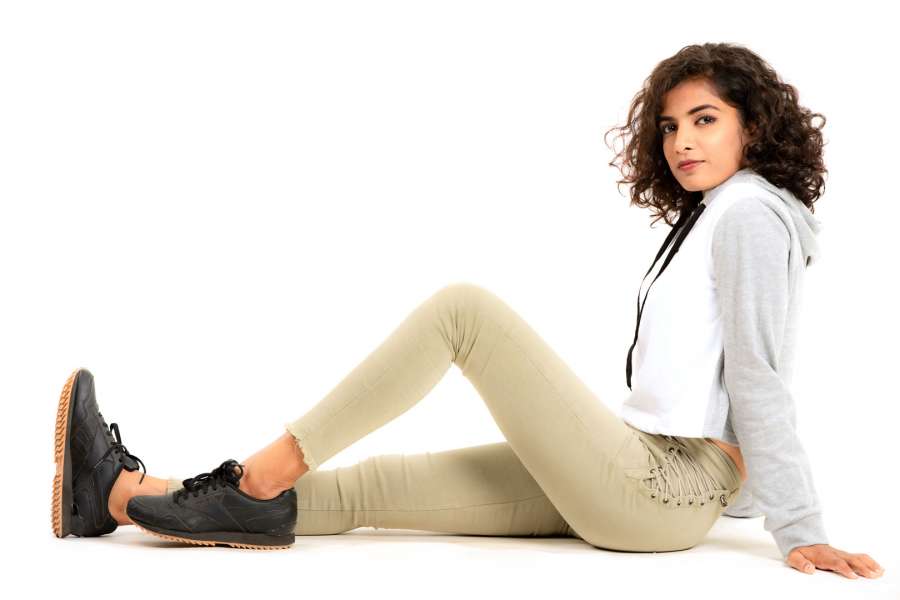
Option 1: The Dedicated E-commerce Studio (₹300–500 per garment)
These studios are built like production lines, and honestly, that is their strength. Everything is pre-set:
- Fixed backdrops — white, gray and beige seamless setups permanently rigged and lit. No setup time, no experimentation.
- In-house models — a small roster of models available on rotation, already familiar with the poses the studio shoots.
- Makeup on site — one look, applied once, maintained through the day.
- A video corner — a standing setup for short product videos, usually a slow turn and a walk-in/walk-out clip per garment.
Because nothing changes between clients, the studio can push through enormous volumes. That efficiency is exactly where the ₹300–500 pricing comes from. If you are a reseller moving fast-turnover inventory where the photo just needs to show the product accurately, this model works. This model might be perfect for a b2b business (ex. A manufacturer pushing products to distributors & retail outlets). But this is a definite no if you want to make it big in the b2c segment.
The catch nobody mentions at booking
Every brand walking into that studio gets the same models, the same poses, the same lighting, the same backdrops. Now picture your customer scrolling a marketplace listing page. Your kurta set sits next to a competitor's kurta set — shot in the same studio, on the same model, in the same pose, against the same white paper.
At that point the only differentiator left on screen is price. You have handed the comparison entirely to the discount column. There goes the perceived value of your product — not because your garment is worse, but because nothing in the image says it is different.
What about AI-generated model images?
AI try-on and AI model tools looked like the escape route from studio costs. But brands using the same handful of tools end up with a recognisable "AI look" — similar faces, similar skin rendering, similar lighting logic. The differentiation problem does not go away; it just becomes cheaper to have. Several brands have also reported customer trust issues when fit and fabric drape in AI images did not match the delivered product — and in apparel, drape and fit are the purchase decision.
PRO TIP: AI images are useful for concept testing and ad variations. For your primary catalogue images — the ones a customer zooms into before paying — fabric texture and true drape still need a real garment on a real body.
Option 2: The Customised Shoot — Full Logistics Breakdown
A customised shoot costs more per garment. The question is whether the extra cost buys you something measurable. Here is every line item, so you can decide with real numbers.
1. Model selection — this is a positioning decision, not a casting call
In a dedicated studio, you get whoever is on shift. In a customised shoot, you choose the face of your brand for that catalogue. Two broad directions:
- Relatable — a model your customer sees themselves in. Works for everyday wear, value-focused brands, size-inclusive lines.
- Aspirational — a model your customer wants to become. Works for occasion wear, premium positioning, trend-led collections.
Model fees vary accordingly — freshers and portfolio-building models cost a fraction of experienced e-commerce models who can hit thirty clean poses an hour without direction. Neither is "better." The right choice depends on where your brand sits and where you want it to sit. (Ex. a premium silk saree label shooting on a fresher to save money often reads as a mid-market label in the final images — the saving shows.)
2. Garment prep — the ₹15–30 nobody budgets for
Every garment must be steamed before it faces the camera. Budget ₹15–30 per garment for professional steaming, and understand why regular ironing usually will not do:
- Irons flatten pile and texture on fabrics like velvet, crepe and knits — the camera sees a dead surface.
- Direct iron contact can leave shine marks on synthetics and dark fabrics, which strobes will amplify mercilessly.
- Steaming relaxes the fibres so the garment drapes naturally on the body — and drape is what the customer is actually evaluating.
PRO TIP: Steam on location, not the previous day. Garments crease again in transit and on hangers. A steamer running beside the changing area, working two garments ahead of the shoot, keeps the line moving without holding up the camera.
3. Styling — optional, but it is where "catalogue" becomes "brand"
A stylist is a dedicated role: someone who mixes and matches your SKUs, adds accessories, pins and clips garments for the best silhouette on that specific model, and plans looks in advance so shoot day runs on a sequence, not on improvisation.
Be aware of what this does to your budget: adding professional styling can shift your per-garment cost from the low hundreds towards the ₹1,000 mark. That is not padding — styling demands prior planning sessions, a look-book, accessory sourcing, and an extra person on set for the full day.
When is it worth it? When your garments are sold as looks rather than single items (ethnic sets, co-ords, layered western wear), or when your brand pages need editorial-quality imagery that also feeds social media. When is it skippable? Single-item basics where the product photographs cleanly on its own.
4. Two models, one camera — the maths of SKUs per day
Here is the logistics detail that decides your entire shoot budget: book two models, not one.
With one model, the camera sits idle every time she changes — and a changing cycle with a garment check and touch-up easily eats 10–15 minutes per SKU. With two models alternating, one is being photographed while the other changes into the next garment. The camera almost never stops.
Now factor in fatigue, because it is real and it shows in the images. Posing is physical work — held postures, repeated expressions, standing under lights. Plan 4–6 productive hours per model, with short rest breaks built in. Beyond that window, shoulders drop, expressions flatten, and you will see it clearly when you compare frame 40 with frame 400.
Your SKU count for the day comes directly from this arithmetic. As a working example: two models, 5 productive hours each, averaging 6–8 minutes of camera time per garment including micro-adjustments — you land somewhere in the range of 60–90 SKUs in a day for stills, less if each SKU also needs video. Run this calculation before the shoot and fix the SKU list accordingly. An over-ambitious list does not get you more images; it gets you worse ones after hour six.
PRO TIP: Sequence the day by outfit complexity. Shoot the fussy garments (sarees, layered sets, anything needing pinning) in the morning when models and crew are fresh, and keep simple tees and kurtas for the closing hours.
5. The photography setup — what your money is standing in front of
On the technical side, a customised e-commerce shoot typically runs on:
- Camera and lens — a full-frame body with a portrait-range lens (the 70–200mm and 85mm class are workhorses here) for accurate proportions and clean separation from the backdrop.
- Strobes — studio flash, not continuous LEDs, for consistent colour and the power to freeze movement and fabric flow. Consistency matters because SKU #1 and SKU #80 must sit side by side on your listing page without a visible colour shift.
- Seamless paper — a fresh, clean sweep in white, gray or a tone matched to your brand palette. Unlike the fixed studio, the backdrop here is a choice, not a default.
6. Tethered shooting — approve images while the model is still in the garment
This is the workflow difference that saves customised shoots from expensive reshoots. In a tethered setup (we run Capture One), the camera is connected to a workstation, and every frame appears on a large screen seconds after capture. As the client, you can:
- See a live preview at full size — check the fit, the drape, the pose, the crop — while the model is still wearing that garment.
- Rate frames on the spot — star your selects as the shoot happens, so the edit shortlist is ready before pack-up.
- Leave comments for edits — flag a loose thread, a colour concern, a crop preference directly on the frame, so retouching instructions are attached to the exact image, not written from memory two days later.
Compare this with the production-line studio, where you typically receive a folder of images days later and discover problems when the garments are already back in inventory. Tethering converts "hope the images are fine" into "approved before the next outfit change."
So Which One Should You Book?
Honest answer: it depends on what the images have to do for you.
- Choose the dedicated e-commerce studio if you are a reseller, if your products compete purely on price, or if you need functional catalogue images at maximum speed and minimum cost. It is the right tool for that job.
- Choose a customised shoot if you are building a brand — if your garments are supposed to look like yours, if your listing images double as your social and ad creatives, and if you would rather compete on perceived value than on the discount column.
The per-garment cost of a customised shoot is higher. But spread across the lifetime of a listing image — every ad impression, every product page visit, every scroll-past-or-stop moment — the cost per use tells a very different story than the cost per garment.
Quick Planning Checklist
- Lock your SKU list based on the two-model, 4–6 hour arithmetic — not on wishful thinking.
- Budget ₹15–30 per garment for steaming, and arrange steaming on location.
- Decide styling early — it changes the budget, the prep timeline, and the crew list.
- Brief the model selection against your brand positioning, not just against rate cards.
- Ask your photographer whether the shoot is tethered and whether you can rate/comment on set.
- Confirm backdrop tones against your marketplace requirements (most marketplaces mandate white or near-white for primary images — check the platform's spec before shoot day).
Plan the logistics well, and shoot day becomes the easiest part of your launch. Plan them badly, and the most expensive images you will ever pay for are the ones you have to shoot twice.
Artriva Studios plans and executes customised e-commerce and catalogue shoots for garment brands in Bengaluru — from model selection and styling coordination to tethered, client-approved capture. If you are budgeting a shoot and want the SKU maths done for your specific catalogue, reach out.